I'm not only going to show you how to beautify a face, but I will also make suggestions that can be useful for other projects. I will also explain how to use some of the tools involved and show you how to work in a non-destructive way (click here to read more about Non-Destructive Editing in our Photoshop tutorial ). You might also consider to read my article about the Digital Darkroom.
The tutorial is written for Photoshop 7 and higher, but some of the techniques that are shown in this tutorial or advice that is given, can also be useful for those who use older versions of Photoshop.
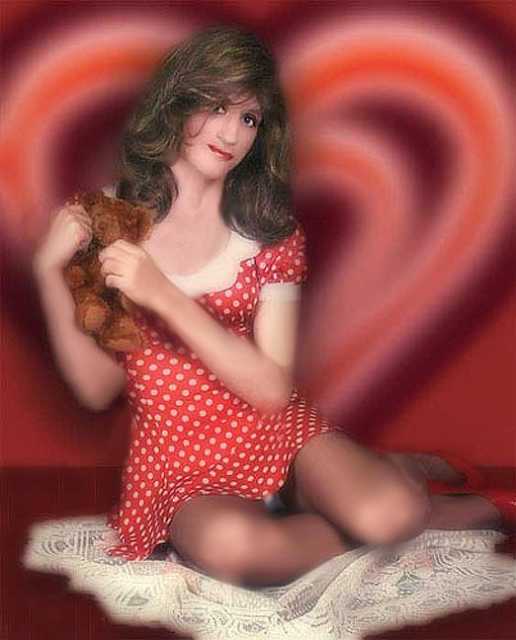
We're going to use the following image:

You can grab the larger original version (596kB) by right clicking on this link Girl and selecting (when you use Windows) Save Target As... (Note: estimated download time on a modem is 2 min). This larger file is the one that we're going to use in this tutorial and not the preview above.
The following image shows you all the steps of this tutorial, so that you have a global idea how we're going to retouch this photograph:

Important to know: if you want to jump to a step really quick, just move the mouse cursor over the description of a particular step until the cursor changes into a hand (when you use Windows) and then press your left mouse button.
There are a few things that you have to keep in mind when you want to beautify portraits;
- It's important that you calibrate your monitor
- Avoid reflections or bright light on your monitor's screen.
- Analyze the image carefully before you start and figure out what you want to correct.
- Plan ahead; what are you going to correct first, which techniques or tools are you going to use.
- Work with large images (more pixels is better)
- Avoid images that are heavily damaged by strong lossy compression like Jpeg. It's preferred to work with lossless formats like TIFF, RAW, PSD, etc. (Lossless formats always contain the original data, no pixels or color is lost). In this tutorial we're going to use a Jpeg image to show you that we will run into a problem when we want to color the scarf.
- Zoom in as much as possible, because it allows you to work extremely accurate and that's very important, because we want to avoid as much as possible that he image looks retouched.
- Constantly check your progress by turning off/on the layer with your corrections, because it makes it easier to see when you've gone too far. Also make sure you check your image at 100% (1:1) on a regular basis.
- Name your layers. Why is that so important? It's because sometimes we have layers on which we only have very small corrections for eyes, mouth, teeth, etc which can't be recognized just by looking at the layer's thumbnail. This can lead to mistakes, frustration and lost time.
- Lock every finished layer. This is to avoid that we make corrections to the wrong layer and discover this days or weeks later when it's too late.
- Try to work as much as possible non-destructively (Photoshop tutorial about Non-Destructive Editing)
- It's very important to work slowly and patiently. Be critical and don't be afraid to mess things up. As long as you work Non-Destructively it's going to be easy to undo mistakes, even days later.
- Learn the most important navigation techniques (Photoshop tutorial about General Navigation). This not only allows you to work faster, but also more efficient. You will notice that it will increase the quality of your corrections.
- Always start with a global light and color correction and end with a proper crop and sharpening if necessary.
General Tips |
It's important before we retouch a photograph that we calibrate our monitor if we haven't done that yet. There are several ways to calibrate a monitor and the most common way is to make use of Adobe Gamma, a utility that comes with all latest versions of Photoshop. I'm not going into much detail how you can calibrate your monitor, but I would like to share some links with you that explain how to use this tool:
Adobe: Using Adobe Gamma on WindowsAdobe: Setting up your monitor for color management (Acrobat PDF file - 1.78MB)
Important is to set at least the Black- and White (B&W) Point of your monitor. I wrote an article in the past that explains how to do this (it's quite simple actually): Monitor B&W Point
What we're trying to avoid by setting the B&W Point is that the screen of our monitor is going to be too bright or too dark. It's very simple; if we have details in the brightest or darkest areas of our image then we want to be able to see them. It also avoids that we have major surprises when we decide to print our images.
It's also important that we know how to quickly zoom in/out, move the canvas, how compare the retouched part of the image with the original in a rather fast way, etc. That's why I advice you to read the Photoshop tutorial about General Navigation which explains in great detail how to navigate in the most efficient way. So I will assume that you understand what I mean when I write for example in this tutorial: "Zoom in to 200%".
Very important to know is this; quite often I talk about brush sizes, whether it's about the Clone Stamp Tool, Patch Tool, Brush tool, etc and often I advice a particular brush size. Remember that you can change the size or hardness of a brush at any time by using the following shortcuts;
Shortcut | ||
[ | Decrease the size of the brush | |
] | Increase the size of the brush | |
Shift + [ | Decrease hardness of the brush (softer edge) | |
Shift + ] | Increase hardness of the brush |
Remember these shortcuts, they save you lots of time and encourage you to change your brush more often and in return you'll achieve better results.
Now let's get started with our tutorial and move to the next page.
Next: Photo Level Adjustments
Written by , personal technology columnist and founder of Most Useful Tricks. You can follow him on the social web or sign up for the email newsletter for your daily dose of how-to guides and video tutorials.
In crossdress photoshoot, photoshop facelifting, photoshop tips for crossdressers


0 comments:
Post a Comment