CopyRight

Total Pageviews

Blogroll

Main Menu (Do Not Edit Here!)

Twitter (Don't Edit)

Disqus for Labnol like blogger template

Powered by Blogger.

Followers

Search This Blog

Showing posts with label makeover. Show all posts

Saturday, July 30, 2011

couch mode print story

Very Important Killer Crossdressing Makeup Tips


When you are just learning how to cross dress, the idea of sitting down at a makeup counter in your local mall is intimidating. You don't need to out yourself to learn to cross dress in style. If your goal is to learn to pass as a woman, these makeup tips are a definite start.
Wash Your Face - You should always begin applying makeup with a clean face. Be gently, and don't rub your face. Use a good cleanser and rinse well to remove it all. Apply a toner to refresh your skin after washing.
Shave - Use a good quality razor and shave as close as possible. Be careful to avoid nicking your skin. Shave first in the direction of hair grown, lather again, and shave in the opposite direction. This will insure that you get the closest shave possible.


It is best to shave immediately following a hot shower so that the pores are open. If you do not plan on showering first, wrap a hot towel around your face for the best results. Rinse your face with cool water after shaving to close the pores back up. You should wait at least 5-10 minutes after shaving to apply makeup. You skin needs time to recover from the razor.
Consider using a kaolin clay mask in addition to cleansing and shaving. Clay masks will draw out the impurities in your skin and provide a smoother surface for applying makeup. A smooth surface is the most important aspect of good looking and easy to apply makeup.
Moisturize - Dry skin will soak up your foundation fast and ruin the effects of applying makeup. Make sure to use an oil free variety. Moisturizing will provide your foundation with a base. Make sure to wait until the moisturizer is soaked into your skin before moving on to applying foundation.  If you are not allergic to scent, consider a moisturizer with a nice, feminine smell.
Apply Foundation - If you are using a liquid foundation, apply it to your hands and spread it to your face that way. Make sure to smooth foundation out with a sponge without pulling or stretching your skin, Be extra careful and gentle around your eyes where the skin is very thin.
Set your foundation with a loose powder. On hot days, foundation will require periodic touch ups.   Concealer should go on after the foundation.  You may need a heavier foundation if your facial hair tends to grow quickly.

Wednesday, June 29, 2011

couch mode print story

How to Hide Masculine Features With Makeup


How to Hide Masculine Features With Makeupthumbnail
Hide Masculine Features With Makeup
For men who like to cross-dress or who are pre-op transsexuals, learning how to use makeup to hide masculine features is one of the essential keys to "passing" as a woman. The wonders of makeup today offer an array of options to help hide the aspects of a man's face that make him look most masculine. What follows are some helpful steps to take to conceal masculine features and enhance feminine ones.

Instructions

    • 1
      Maybelline Pure Concealer, Light #610Invest in a heavy-duty foundation and beard cover. The beard and mustache areas are hard to cover with makeup, but there are several great "concealer" products out there designed to provide maximum coverage.
    • 2
      Acquire a very good powder that matches your concealer/foundation. To attain the best results, you want your face to look as natural as possible. Hiding masculine features is key, but you also want to blend the makeup so that it doesn't look like you are hiding anything. Having a top-end concealer and a matching powder is the first best tool in your makeup arsenal.
    • 3
      CoverGirl LashBlastFusion Mascara Very Black 860, 0.44 fl Oz, 1 Tube
      Use eye makeup to obtain maximum femininity, but try to use it sparingly. The eyes are arguably the most beautiful part of the face, so you should enhance them with a nice shade that accentuates your own eye color. Opt for some top-end mascara that does not clump and try to avoid overkill. If the eyes look too heavily made up, they look fake and downright garish.
    • 4
      Pluck your eyebrows or, better yet, have them waxed. Very few women can get away with thick eyebrows. To achieve maximum femininity, you want to shape and groom them by tweezing or waxing.
    • 5
      Select the perfect lipstick and lipliner. This varies depending on skin tone, hair and eye color. If you are a brunette, you might try something in the plum line. If you are blond, you should consider pinker tones. The main point is to keep the lips subtle while still drawing attention to their beauty.

couch mode print story

How to apply a flawless foundation(2)


Everyone asks me how to do their makeup better, and I’m certainly no expert, but I’ll tell you what I’ve learned over a few years of doing it. And it all starts with foundation (or coverup, same thing).

.
I’m going to fly in the face of modern dermatology here, but you’re going to want a good thick cream foundation. Everyone these days uses powders or liquids or whipped foundation because they are lighter and let your natural skin color show . . . and they don’t clog your pores. But they also don’t cover up stubble. And I’m not talking about “I didn’t bother to shave this morning” stubble, most modern foundations won’t ever cover “I just shaved 5 min ago” stubble. Unless you are lucky enough to have really fine hair, in which case ignore everything I say.
.
Don’t fret too much if you need cream coverup, you probably don’t wear it often enough or long enough to worry about clogging your pores – remember most gg’s wear the stuff 12 hours a day every day! The only trick is finding the stuff (and in the right color). Look for makeup in a compact, not in a bottle or jar. And make sure it says “cream”. Neutrogena makes a pretty decent one if you need a place to start looking. Or you can try Ultima II which is available off of Amazon, but it’s a bit light on coverage for a cream.
.
Colors have semi-standardized names, so you can guess a little bit, but your best bet is to go into a store and compare the color sticker on the package to the skin on your wrist (palm side). You’ll probably want something just a tiny bit darker than your skin if you’re in between shades, otherwise get the closest match. If you’re guessing from the names, here’s a basic guide. “Ivory” is the lightest shade and has little color in it. “Natural”, “Amber”, or “Nude” are light skintones with some color in them (not color as in tan, but color as in more yellow than grey). “Buff” and “Beige” are usually medium tones but with a bit less yellow (leaning towards grey). “Golden” and “Honey” are medium tones with color. “Tan”, “Almond”, and “Cocoa” are exactly what they sound like. And of course there are combinations of the colors like “Natural Ivory”. And then sometimes the colors just make no sense. If you’re just looking at the colors on your computer screen though, err on the light side – most people guess a little too dark, and because your screen is backlit colors will look brighter than they are in real life. 
.
Before you apply your new makeup, take a shower. Seriously. And wash your face, but don’t over-do it – you want to get any dead/dry skin off, but you don’t want to dry your face out and create new dead skin either. Stay in the shower for awhile with pleasantly warm water . . . makes a great time to shave your legs too. Now, if you want great makeup, apply a quick and thin coat of foundation while your face is still damp (not dripping, just damp). The moisture will keep the makeup spread out thin. Go cool off and dry yourself off, letting the foundation set up. Obviously don’t touch your face for a few min or stick it in a towel!
.
When you’ve got your foundation in hand and are ready to apply it (this goes for the base coat if you put one on, or your “topcoat”), use a sponge or cotton pad – lots of coverup will come with a sponge anyway, which is great. Cotton pads may leave fuzz if you have course hair. “Brush” in the direction of hair growth as a general rule, unless you find a little hair that you missed when shaving in which case go over it in the opposite direction first and then in the direction of growth. Spread the foundation out thin at first, you don’t want cakes of it, and you can always go back over and add more if you really need. Keep it off your eyebrows and hair, because that just looks funny. Feel free to go over your eyelids and lips though, as that will help keep your eyeshadow and lipstick in place when you apply them overtop the foundation. And don’t forget the little places, like the undersides of your eyes, and underneath your nose. Take the foundation all the way down your neck, but spread it out *really* thin towards the base of your neck – you want it to cover any stubble down your neck, but the color needs to fade out to your natural skin gradually. Don’t rub it in, just gentle strokes in one direction.
.
That’s it, all there is to it ;) Ok, that plus a LOT of practice. But you’ll get the hang of it. And don’t worry, it may not look like much, but you’re well on your way to being one hot crossdresser 

couch mode print story

Innocent Eye Makeup for crossdressers


innocent eyeshadowHere’s a great new eye makeup style that I learned about which creates a very subtle and innocent look. I tried it out for the first time today, and I’m pretty happy with the results :) There are two major lessons here that I will probably apply to other styles as well. First is applying a horizontal gradient across the eyelid . . . previously I had always used a vertical gradient (ie from lashes up to eyebrow) because it seems “natural”, but it turns out that a horizontal gradient (ie from nose outwards) does a great job of softening shadows that fall on your face – perfect for that “innocent” look, and also great for generally making you look younger. Second is using a similar technique for eyeliner on the bottom lid. I’d always had a hard time with eyeliner looking too dark on my lower lid, but if I didn’t add any at all then my eye lacked definition. Believe it or not, creating a horizontal gradient with your eyeliner is also a great makeup trick!
.
Step 1:
eyeshadow base layerOk, first step is to apply a base layer of the lightest color you will be using. Always start light and layer on darker colors, regardless of which direction your gradient goes. If you do it the other way around, you will have a hard time with smudges and streaks. To get a nice innocent look, I started with a base layer of white eyeshadow and filled my entire upper lid from lash to brow. I also added a streak of white on my lower lid. Be careful adding light colors on your lower lid though, because whites and silvers have a tendency to accentuate wrinkles (and most people have some wrinkles under their eyes even when they are relatively young). If you can’t pull off white or silver, try a brown that’s lighter than your skin tone.
.
Step 2:
eyeshadow gradientNext step is to add the gradient. Select a darker color (purples or blues work great for this) and “dab” it into your eyelid on the outer edge. This keeps the lighter color towards your nose where shadows tend to form, thus counteracting the shadows and softening your face. Anyway, dab away, but don’t blend or smudge – you’ll end up with way too much color and the darker shade will just go everywhere. Dab dab dab. You don’t need much eyeshadow for this. Also follow the line of your eye *up* your cheek a bit – this will elongate your eye a bit, but make sure you go up your face so you don’t make your eyes look droopy!
.
Step 3:
eyeliner baseI’m going to break my own advice here on step 3, and I don’t have a good justification for it. Just trust me :p Ok, grab your black eyeliner (or black eyeshadow with a thin tight brush) and trace your upper lash line like you normally would. You want a nice thin line because most of your eyelid is a very light color that you don’t want to overwhelm. Work from the inside edge outwards, and be sure to pull your skin taught. to keep the line crisp. Now on to your bottom lid, start from the *outside* edge and work your way about 3/4 the way across your eye. No further, just 3/4 the way across!
.
Step 4:
eyeliner gradientOk, now grab a bright white eyeshadow, preferably brighter than what you coated your eye with. Using a small tight brush, start from the inside edge of your lower eyelid and pull a single thin line of white out towards where you stopped with the black eyeliner. You’ll want to go about halfway across your eye (overlapping the black), but allow the white to fade out into the black eyeliner where they overlap. This should create a nice gradient that brightens up the lower inside corner of your eye. It will make you look more awake and perky ;)
.
That’s all there is to it! Now you have perfect eyes for a schoolgirl outfit, wedding, or any other innocent look.


Courtesy: http://thecrossdresser.org/2009/05/innocent-eye-makeup/

couch mode print story

Photoshop tips for crossdressers


Here is something I see WAY too much of – a beautiful tgirl who has totally botched a photo of herself by carelessly overusing Photoshop. I personally have no problem with using image editing to remove the occasional flaw, though frankly the flaw is often easier to take care of in real life with a little planning before the photo! Photoshop is an amazingly powerful tool, but while it is very capable of turning you into an airbrushed goddess, it is equally if not more capable of turning you into a corpse or cartoon. So a) use Photoshop correctly, and b) don’t overuse Photoshop.
.
Ok, Photoshop is a tough program to learn. So here’s a crash course on touching up a photo. I’ve selected a rather old photo of myself from before I started shaving – you know, back when crossdressing was just about feeling the clothes on my body . . . anyway . . . Here I am dolled up, my makeup done . . . but I’m still rather rough looking in the face, and DAMN am I hairy :(
.
I’ve purposefully selected a difficult photo to work with here – my first recommendation would be to shave or at least hide all that hair! But take a look at the arm hair which is much more manageable, and the roughness of my face. Those items are easy to fix in PS :) And while we’re at it, we’ll clean up the dingy colors and get rid of that harsh shadow behind me. How’s that for a start? You’ll notice I did select a photo where I’m happy with my facial expression, my eyes look fairly bright, and I have a nice clean smile. Fixing up those items if you need to will have to wait for another day.
.
apply scratch removalOk first step. Open up your photo, crop it as you see fit, and create a duplicate layer of your image. We’re going to edit this layer and then hide it . . . and reveal it selectively in places that need help.
.
Now on the duplicate layer, apply a “remove dust and scratches” filter. You can also use a “median” filter, though I find dust and scratches works a bit better for hair and spots on the skin. Crank up the radius of the filter higher than you normally would – remember, we’re going to hide this version of the image anyway. You want it to completely take out all of the blemishes you can without totally losing the image.
.
Notice that doing this results in some ugly color edges, sort of like using a posterize filter. Don’t worry, we’ll take care of that in the next step. Also note that I’ve totally distorted the image, but that’s ok . . . obviously if you don’t have as many blemishes to deal with as I do here, it would be better to tone down the filter a bit. But even with this aggressive filter I still haven’t fixed all of my chest hair. We’ll get that later.
.
gaussian blurNext step is to take care of the funky edges that the dust and scratches filter introduced. Apply a Gaussian blur to the image. Again, you’re going to want to crank up the radius on this filter higher than you normally would. The idea is to smooth out all the transitions and edges that the dust and scratches filter created. Don’t worry about the edges of your image, or the features on your face for that matter :P They will come back.
.
At this point you should have a relatively clean but dreadfully obscured photo of yourself. Remember, I’ve selected a particularly problematic photo as an example, so hopefully yours doesn’t look QUITE this bad. And don’t worry at this point, it only takes a little practice on these two steps before you start to get a feel for the settings to use. Save your time and effort for the next step ;)
.
Before we get into step 3, we need to hide all this blurring so we can see straight again. Create a layer mask attached to the duplicate layer and select “hide all”. This will make your entire duplicate layer disappear. So much for all your hard work so far, hmm? Don’t worry, this is where the magic of Photoshop comes in. We’re going to paint in the blurry image where we want to cover a blemish, and keep it hidden where we don’t need it.
.
layer maskOh here’s a strange image for you. This is my layer mask – you won’t see this image except in the thumbnail in your layers pallete, but I wanted to show you how I painted in the blurry image. The white spots are where the blurry duplicate image are revealed, and the black spots are where it’s completely invisible. You can see my brush strokes pretty clearly here, but these edges don’t really show up thanks to the fact that I’m just revealing a blurry version of the same image – they naturally blend into the underlying image so you don’t even have to worry about them :)
.
Ok, to create this mask grab the paintbrush and set your foreground color to white. You’ll want to set the opacity and flow to something around 50% each – this will let the duplicate image show up slowly over a series of strokes rather than right away at 100% wherever you click. If you have a pen tablet, now’s the time to break it out – it will make this step MUCH easier. In fact if you’re using a mouse, you might consider setting the opacity and flow to 20%.
.
Once you’ve got your brush set up, start painting on your skin only! I can’t think of anything other than skin that you’ll want to use this on, as it will completely obliterate textures. Speaking of which, some people recommend adding some random noise to the duplicate layer after all your blurring to match the capability of your camera (all cameras naturally introduce some noise, and if the background has more noise than your face something might look fishy). Personal taste though, I usually don’t add the noise back in. If you want to, try something around 1% though.
.
Don’t paint all of your skin! Remember how the blurry image lacked any definition and all your features disappeared? People have natural lines and edges. We’re 3D afterall. So don’t flatten yourself out. When you get to an edge or a corner or even a dimple that’s supposed to be there, leave it be! Don’t paint over your eyes or your lips, and only touch your nose right along the bridge. For the most obvious example of leaving an edge be, look at the area of this mask where my collar bones are – completely black.
.
masked imageHere’s what your image should look like once you finish your mask. Much better already! Ok, my chest looks like crap still, but check out what the airbrushing did for my arm hair and face :)Generally speaking, if you have a difficult spot to get rid of, brush perpendicular to the spot (ie across the hairs, not with them). And if you have an edge you want to preserve, brush parallel to it (ie the strokes near my collarbone). A single spot can be taken care of by just tapping the pen or click-click-clicking the mouse a bunch of times – this will progressively make more of the blurry image fill in until the spot is gone.
.
Really take your time on the airbrushing part. Change your brush size for different areas, and be very careful when you come up against ridges or lines. Make sure you stop to think if that line should be there or not. You’ll notice that I erased some of the lines around my mouth, but I carefully left a few there as well – if I hadn’t, my face would look really funny. Another good idea is to never ever airbrush hands or feet – these body parts have such a complex surface that even a little airbrushing can completely ruin them. Also take care around any bones that stick out, like around your wrist – these are subtle gradients rather than lines, but they are important for defining your body and you don’t want to erase them.
.
dodge away chest hairTime to take care of my ridiculous chest hair. We’ve already tried to blur it away without success, so let’s unselect the layermask and work directly on the blurry image (remember, this image should be almost completely visible in the chest area since we were trying to blur away my chest hair). Instead we are going to dodge it away, so grab the dodge tool and do something you never do with dodge. Set it to dodge shadows. Normally you want to dodge highlights to brighten them, or burn shadows to darken them. In this case I actually want to erase “shadows” by brightening them. Again, set your opacity low to begin with so the dodge occurs gradually.
.
After dodging away at the chest hairs you will eventually get to a nice even tone across the chest, but it will probably be pretty gray-ish. A quick remedy is to select a nearby skintone, add a new (blank) layer on top of the duplicated layer with a blending mode of overlay, and paint in a little color. You’ll want to set the opacity on your brush very very low for this, but just use the paintbrush to color in a little skintone. With a little luck the overlay blend mode will retain the shading of the chest so it still has some shape while adding in some color from the new layer.
.
color correctionOk, time for a relatively easy step. Flatten your layers from the previous work once you’re satisfied with them. Now it’s time to work on the composite image as a whole. Alternately you could do this step first on the original image, but I always forget :P The original image here was a bit dark, and the shadows were very sharp. Often if you Auto Tone, Auto Contrast, Auto Color the image (in that order), Photoshop will do a rather nice job for you and you’re done.
.
In this case my image needed a little extra loving attention, so I went into Image->Adjustments->Levels command. I brought the white slider down a good bit to increase the number of white pixels in the image. Then I bumped the black slider up slightly to make sure the shadows in my photo were actually black. And I shifted the medium gray slider (aka the gamma) to lighten the image a bit – this slider reduces the total contrast in the image if you move it from 1.0, so be careful with it. Overall not bad though, hmm?
.
final airbrushed imageOk, the last step! Let’s soften that terrible shadow behind me. Hopefully the shadow won’t be as bad in your images, because I didn’t manage to get rid of the whole thing. But the steps are pretty easy. Grab the Quick Selection Wand and select yourself. Ok, that step might take a few minutes of playing around, but it shouldn’t be too difficult to get a decent selection. Now open the Select->Refine dialog box and feather the selection just a bit. You’ll also want to contract it so that the shadow is definitely outside of the selection. Now copy yourself onto a new layer.
.
Open the blending settings dialog for your new layer, and give it a drop shadow. I know, I already have too much of a drop shadow, but trust me! Now set the shadow color to white and the blending mode to screen, and set the light direction to be opposite of the current shadow – this will cast a white shadow on top of your existing shadow 8-)Play around with the size until you get it right. You can also add an inner glow to clean up any shadowy parts that were inside your selection.
.
And that’s it! Now you have a properly airbrushed and fixed up image, no matter how bad it looked like to begin with :)


Tuesday, June 28, 2011

couch mode print story

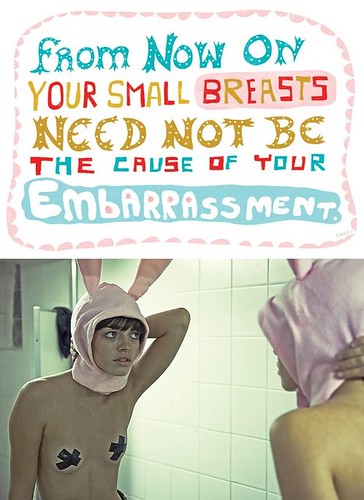
How to visually enhance small breasts


Big and full breasts are considered as a token of femininity and sexual appeal. Thus many of those women who have small breasts feel inferior or less confident than those who have large breasts. There are many ways of how to visually enhance small breasts without any radical changes such as plastic surgery. From special foods and exercises that help breast muscles stay in tone to bra types and clothing color – all may play a part in enhancing small breasts.


Choose a right size bra. The first thing to do is to find a right size bra. Why? Because the bra has to fit perfectly to provide necessary support the breasts and make them look good and be comfortable. Learn how to determine your bra size here.


Pushup Bra. A pushup bra visually enhances the chest and forms a cleavage. Thus your breasts appear to be bigger. Pushup bras push the breasts together and lift them up which creates a visual illusion of larger breasts.

Pushups can be padded to enhance the breast size. They can also have the inserts filled with water or under wires for a more natural shape and look. The inserts can also be filled with gel, air, foam or silicone. Silicone inserts look best of all as they are worn on the outside of the bra. The pushup bra has to tighten the breasts but it should not sit too tight and cause discomfort.


Padded Bra. The padded bras due to the padding in the lining visually enhance small breasts but unlike the pushup bras do not significantly lift them.

Also opt for bras with thin spaghetti straps they will contrast with the breast size. Shiny silky material also works well for small breasts. Black, red, deep purple, chocolate brown colors are almost classic for sexy lingerie so opt for them, though carefully since the darker tones tend to deemphasize the size.

Open shelf or cupless bra. The cupless bra is specially designed to provide a good support but has no cups or has a small line of fabric just below the nipples. It fits great for breast enhancement as it lifts breasts and draws attention to them and the cleavage.


Choosing lingerie for small breasts. Another approach to choosing lingerie aside from pushup and padded bras is to look for babydolls or tops embroidered with ruches, lace, glitter or other things around the bust line as they visually enhance small breasts. Or you can also choose babydolls with a built-in pushup or padded bra. One more way is to show off your bottom or legs or use garters and stockings if you are slim to draw attention from your breast size.


You can also opt for an under bust corset or a waist cincher in a combination with a pushup bra or a bra with ruches as the corset itself has a pushing effect. This will make your chest appear wider and visually enhance your breasts due to the pushup bra effect. You can also combine a dark corset with a lighter bra which can also make your breasts look bigger.

The over bust corset is a special occasion item but if you have a passion for that opt for those which have rich embroidery in the bust line, again ruches and bows will do. Plus due to the hour-glass shape that the corset provides, your waist will become thinner while the chest wider and bigger. Do not wear tops or babydolls that have a high bust line as it draws attention to the breast size.

Posture. In order to be beautiful and healthy you have to have a right posture. Hold your back straight as it is not only visually lifts up your breasts and enhances them, but it is also simply beautiful. Incorrect posture can bring back aches and other back problems.

Color tricks. These may not very well work with lingerie, but you can use them to choose clothes. Opt for light colors for bust line and dark ones for lower part of the body. Thin horizontal stripes also enhance your chest and combined with the dark bottom will deemphasize the wide hips.

Makeup. Applying some make up to your chest can also visually enhance the small breasts. The first technique is to apply shimmery light powder to the upper part of your chest and highlight the area between your breasts with a darker powder. Apply as an eye makeup thoroughly blending in the two tones.

The second technique is completely the opposite. Use the darker tone on the upper part and the lighter one in between the breasts. Which one of these techniques suits you better can decide only an experiment.

Accessories. Accessories and small details can visually enhance small breasts accentuating the cleavage. Opt for the thin chains and small pendants as the delicate designs greatly contrast with the breast size.

Now let’s summarize all the things that help us visually enhance small breasts: special bras, ruches, lace, glitter, bows, under bust corsets, garters and stockings, light colors, thin horizontal stripes, good posture, special makeup and accessories. The things to avoid having the small breasts are the high bust line tops, tight clothes, loose clothes; breasts “disappear” in it.

Category: Lingerie tips

couch mode print story

How to Make Your Breasts Beautiful with Exercises


As centuries pass by, the standards of a beautiful bosom have changed for a number of times, today an ideal bust is considered the one with a shape that remains the same no matter what movements your body performs. Hence, a beautiful bosom is considered the one with high, elastic breasts, regardless of their size; the main point of a beautiful bust is its tone. The perfect sport to increase the tone and improve the appearance of your breasts is swimming, the second alternative, in case there is no way to practice this sport, is to see a fitness trainer or do some simple but effectiveexercises, which will help you strengthen the pectoral muscles by yourself.

Exercise 1 for Beautiful Breasts. Pressure

Applying pressure is the simplest exercise for your bust. Stand tall facing the wall, lean against it with your hands. Press against the wall as hard as you can, as if you want to move it, keep on pushing for 10 seconds. Relax, shake your hands. Do a set of 10 repetitions.

Exercise 2 for Beautiful Breasts. Elbows Touch

Stand tall, bend your hands slightly in the elbows, keep your hands on your hips. Try to touch your elbows one to the other behind your back, do not do it in jerks, but rather do it slowly, stretching the muscles for 10-15 seconds. Repeat 8 times.

Exercise 3 for Beautiful Breasts. Palms Pressing

The next exercise for beautiful breasts is as follows: join your palms in front of the chest and press them hard against each other for 3-5 seconds. Repeat 8-10 times.

Exercise 4 for Beautiful Breasts. "Dry" Breast-Stroke

If you can not go to a swimming pool, do this effective exercise to improve the tone of your breast. Stand tall, nestle up to the wall, squeeze the pectoral muscles and make movements, as if you are breast-stroke swimming. Do a hundred slow strokes, keep your pectoral muscles tense all the time.

Finishing Exercises for Beautiful Breasts with Posture Exercise

The best way to finish this set of exercises for your bust is to do an exercise which targets your posture. Take a thick book, put it on your head and walk around the house for a few minutes like that, trying to keep it on your crown. This will help you relax the muscles effectively and give them the needed working tone. If you can not walk like that, at least try standing with the book on your head. You can hold on to a chair or the wall, but do not lean against the wall.


Tuesday, June 14, 2011

couch mode print story

Beautiful, natural polished nails


Beautiful, natural nails require care and proper manicuring. A shortish nail that is straight across the top with rounded edges is the current in style shape.
Here are tips for polishing your nails so they will look beautiful and stay looking fresh longer.
Filing nails:
File nails when the white part of the nail tip has grown 1/4" from the pink part of the nail. Filing nails before the nail is 1//4" long can weaken the nail. Allowing the nail to grow to a length longer than the base pink nail length will be sure to make them break easily. Filing from side to side can weaken nails. When filing, go from the corner to the center in one direction. Follow the groove on the side of your nail.
Buffing nails:
Buffing nails can give them a shinier finish. Start at the cuticle and work your way down to the tip with medium pressure. Don't use a back and forth movement as heat builds up and this can damage your nails. Continue lightly until all ridges on the nail surface have disappeared.
Clean nails:
Be sure that nails are clean and dry, free of any oil or lotion, before applying polish. Remove any old polish from nails. 
Base Coat:
Always use a Base Coat and let it dry for at least 1 minute. The Base Coat helps to keep nail polish from chipping and makes polish last longer.
Applying Polish:
Apply two coats of polish. You should be able to cover the nail in three stokes, one on each side and then one in the middle.
Drying time:
Always allow your polish to dry thoroughly for several minutes before you apply the next coat. This will avoid the new coat from dragging on the surface of the previous coat and allow the next layer adhere better. Darker shades take longer to dry. Avoid fast drying polish. It doesn’t last as long.
Top Coat:
Once your nail polish has dried, apply a clear Top Coat to seal it. Continue to apply the Top Coat daily to keep nails looking fresher longer.
Remove with a nail polish remover that contains hydrating oils.

couch mode print story

Cleansing and caring for skin


1. Cleansing
Cleansing is the most critical daily skin care step but it can also strip the skin of natural oils that are important to keeping it soft and healthy. Limit showers and baths to 15 minutes and use warm, not hot, water and a foaming cleanser. Depending on whether your skin is normal to oily or normal to dry, you should use cleansers and products that are formulated for your specific skin type. Apply cleanser to face and move fingers in a circular motion over entire facial area and neck. Rinse with luke warm water. Repeat if necessary to remove all makeup.

To remove eye makeup, use a gentle mascara and eye makeup remover such as the one in our More Beauty and Glamour products page. Always start with the eyes - one at a time. Close one eye, look with the other. Cleanse the first eye gently and completely before you begin the second one Apply eye makeup remover to a cotton pad. Wipe the pad from the brow downward over your closed lid to the base of you lashes. Do not drag against the skin. Repeat several times until the entire lid is clean.

2. Exfoliation
Dead cells prevent moisture from being absorbed into the skin. Shaving helps with eliminate dead surface skin cells but regular exfoliation of the entire face will help keep skin smoother and younger looking. Exfoliation may help protect skin from skin cancer by eliminating abnormal cells before they become dangerous. A granular scrub or moisturizing cleanser that contains AHA helps to slough off dead cells from the skin surface. Elbows, heels and knees tend to dry out more quickly because they are constantly bent and flexed. These areas can benefit from the use of a loofah. If your skin is sensitive, use a synthetic puff or natural sponge. A callous remover is great to use on extra-thickened dry skin areas on your feet such as heels.

3. Toning
Use a non-alcohol, fragrance-free toner after cleanser (and shaving). Toners tighten the pores and restore pH balance to the skin while cleaning it of excess cleanser and makeup. Natural additives such as Vitamin C (which is an anti-oxidant and helps formulate collagen) can boost skin tone and Almond Oil extract calm and heal skin. Beware of Alcohol ingredients that can dry out skin.

4. Firming
A facial masque is another way to firm and improve skin tone. Using a masque tightens skin and makes makeup easier to apply and look better on. If you have 10-15 minutes, enjoy a relaxing bath while wearing a natural clay masque. The natural clay, Kaolin, draws impurities out of clogged pores and minimizes the pore size and helps tighten and refine skin. A moisturizing masque can nourish and replenish skin with youthfulness, elasticity and firmness. It’s a healthy, relaxing treat for your skin.

5. Moisturizing
After cleansing, exfoliating and toning, pat dry with a towel, don’t rub (so that you leave your skin slightly damp) and apply moisturizer. We recommend our Vitamin E moisturizing cream or Kinerase. Applying moisturizer to slightly damp skin protects your skin to lock in moisture and provide a healthy supply of essential nutrients daily. Be sure to apply extra moisturizer or extra intensive moisturizer to dry skin areas and areas such as elbows and heels. Moisturize again before bedtime. Using skin nourishing cream moisturizers not only help to protect and soften skin but also add beneficial natural emollients while they moisturize to keep skin smoother and younger looking.

couch mode print story

Applying lipstick and choosing lip shades


Here are tips for applying lipcolor and choosing a lip shade.
Applying Lipliner
A lip liner pencil is a must for defining lips and keeping lipstick from bleeding. Lip pencils should be the same color or slightly darker than your lipstick. The lipliner pencils should be sharpened and then flattened slightly on the end by strokingit once or twice on a surface. Pencils with a soft texture tend to wear off more quickly than firm textured lip pencils. Start with a lip pencil to outline lips as close to the natural edge as possible--without extending beyond the lip line. Draw in edges to even out uneven lips to make both sides symmetrical. Fill in the lips with the pencil before you apply your lipstick to make color last longer. Use a cotton swab to soften line for a more natural edge. Dust a little powder lightly over your lips before you apply lipstick. This will help lipstick stay on longer. Check out our firm-leaded, 100% natural lipliner pencils.
Applying Lipstick
Use rich colors that go with skin tone. Choose a color that is bright enough to liven up your face but not so bright it over takes your whole look. Sometimes, dark shades that can harden and age your face and too soft shades that can make you look washed out. Experiment to see what works best for your look.

The best way to apply lipstick is to use a lip brush, load it from your lipstick and brush it on. Apply two coast with a dusting of loose powder between coats. This will make lipstick last longer. Try a dab of lip gloss all over lips for a dramatic wet look or just a dab on the middle of your lower lip for a subtle dewy presentation. Check out our Luminous Lips Lip Lacquer in our More Beauty & Glamour ProductsPage.
Choosing Lipstick ColorsLipcolors that work can vary greatly, based on individual taste. Here is a very broad, simplified breakdown of tgcosmetics.com shades that generally work for specific skin/hair types. But don't limit yourself, Experiment to find what works best for you.
• Light to Dark Blond hair/fair skin: Soft pinks (better on younger skin), watermelons, salmon, warm pinks, pink browns, plum reds, soft tomato reds, corals, mauves, rose and rose browns (Misty Mauve, Parisian Pink, Dune Rose, Raison, Apricot Toast, Quartz, Champagne Rose, Infinity. Mulberry, Eruption, Silk, Geranium, Sweetheart, Sheer Power, Cafe, Desert Blossom, Rustique)• Brown hair/fair skin: Warm reds, warm mauves, pink mauves, pink beiges, soft browns, terracotta, plums, and soft plum. (Dune Rose, Rustique, Raison, Porsche Red, Mulberry, Eruption, Infinity, Devotion, Scarlet, Sheer Power, Desert Blossom, Matador Red, Cafe) • Brown hair/medium skin: warm reds, deep reds, rich deep pinks, pink browns, deep mauves, pink beiges. (Dune Rose, Rustique, Raison, Scarlet, Porsche Red, Mulberry, Sweetheart, Matador Red, Rouge, Rum Raison, Eruption, Sheer power, Rouge, Cafe, Vamp. Madness, Blaze)• Brown hair/Olive skin: Light browns, deep browns, soft browns, velvety chocolates, red browns, plum browns, wine browns. (Cafe, Rustique Mulberry, Eruption, Mulberry, Scarlet, Rouge, Rum Raison, Madness, Quartz, Dune Rose, Vamp, Attitude)• Auburn to Red hair fair skin: Raison, bronzes, coppers, orange browns, sheers, soft beiges, brick reds, brown reds. (Rustique, Raison, Quartz, Goddess, Eruption, Sheer Power, Desert Blossom, Rum Raison, Attitude, Dune Rose)• Black hair/Fair skin: Raspberry reds, blue reds, geraniums, fuchsia, rose, medium pinks, berries, burgundies, soft plums. (Misty Mauve, Geranium, Champagne Rose, Mulberry, Porsche Red, Sweetheart, Parisian Pink, Infinity, Devotion, Matador Red, Rouge, Madness, Blaze) • Black hair/Afro-American skin: Nude pinks, nude beiges, mochas, coffees, mahoganies, chocolates, berry shades, dark plums, wines, burgundies (Infinity, Goddess, Apricot Toast, Quartz, Mulberry, Eruption, Silk, Sheer Power, Cafe, Rustique, Vamp, Rapture, Roube, Rum Raison, Madness, Misty Mauve, Attitude.)• Dark hair/Asian skin: Sheer, beiges, pinks, plums, brown plums, bright reds, deep reds, pink mauves, mauves. (Misty Mauve, Parisian Pink, Dune Rose, Porsche Red, Apricot Toast. Quartz, Infinity, Mulberry, Silk Devotion, Scarlet, Sweetheart, Sheer Power, Matador Red, Madness, Vamp, Rouge, Blaze.)• Brown hair/Mature skin: Natural and deep tone shades of warm reds, warm mauves, pink mauves and soft plums. (Misty Mauve, Infinity, Scarlet, Geranium, Sweetheart, Matador Red, Rouge Porsche Red, Raison, Sheer Power, Desert Blossom, Cafe)• Gray or white hair/Mature fair skin: Roses, mauves, warm reds, rich colors in creamy textures. (Misty Mauve, Champagne Rose, Devotion, Apricot Toast, Infinity, Geranium, Sweetheart, Matador Red, Scarlet, Mulberry)

couch mode print story

Applying eye makeup


Eye makeup application takes practice. Experiment with it to find what works best for you. Here are tips for applying mascara, eyeliner pencil and powder eye shadow to help you perfect your look.
Applying Mascara
Before applying mascara, consider curling your lashes with a lash curler to open up your eyes. This is helpful to frame the eyes, especially if your lashes are short. To curl eyelashes with a lash curler your should start by squeezing in "steps" from the lash line to about 3/4 of the way toward tips.
Generally mascara is applied in two coats. To apply mascara, place your finger about mid-lid or on your eyebrow and pull up in order to hold your lid taut.
Holding the wand horizontally, sweep on mascara from roots to ends. Apply only to lash tips at first. Roll the wand slightly as you move, wiggle the wand slightly from side to side, along the lashes to distribute mascara evenly.
tgCosemtics volumizing mascara is formulated with rich moisturizers. Allowing lashes to dry between coats thickens the lash while avoiding clumps. Let the mascara dry for a 4-5 minutes. Don't hurry, relax and wait. This point is where the wet mascara can smudge easily and leave messy marks where you don’t want them. Check your work before you begin the second coat, blinking can cause the wet lash ends to leave tiny mascara marks on your lids. Clean with a Q-tip or tgcosmetics disposable applicator as you go, as needed.
Once the first application has dried, apply a second. For thicker lashes, carefully apply mascara to the upper side of the lashes as well. Wait and let it dry before you continue.
Use your tgcosmetics mascara applicator spiral brush orlash comb to give lashes a final brush-through after they’ve dried to remove any clumps and give lashes a more natural look.
If you apply mascara to lower lashes go light. Apply by brushing the lashes with the wand in a vertical position to sweep across lashes or apply gently lash by lash. Adding too much mascara on the lower lashes can be aging to more mature eyes.

Applying eyebrow pencil
Be sure your tgcosmetics eye pencil is sharpened with acosmetics sharpener, then lightly scribble with it on the back of your hand to dull down the very sharp point and warm the tip. Draw thin lines in the direction your brows grow to define and fill in light areas. Do not draw an outline around brow as this give an unnatural look. tgCosmetics brow and eye pencils have a firmer texture that helps liner stay on longer and causes less breakage when sharpening.
Use a Q-tip or a pointed makeup disposable applicatordipped in makeup remover to gently clean up stray smudges.
Applying Brow Sealer can keep finished brows looking perfect longer.
Applying tgCosmetics Eyeliner/Smudger pencil
The desired effect of an eyeliner pencil is to create the illusion of darkness just above the lashline to enhance the look of the lashes. Gently pull the lid skin taut and start at the inner part of the lid, draw a thin line smoothly and evenly along the upper lid, getting as close to the lashes as possible. 
Once you have a line drawn closely to the lashes, the length of your eyelid, use the smudger end of the eyeliner pencil blend the line until there is no edge to soften it. The effect should be an even graduated color that is darker close to the lashes and becomes lighter and disappears as it get higher. 
If the tgCosmetics liner gets smudged or uneven in the wrong places, simply take a Q-tip or tgCosmetics pointed makeup applicator with a little makeup remover to clean it up or remove it and start again.
Extend a very thin pencil line as close to the lashline as possible, along the most inner part of the upper lid near the nose. This is a place often forgotten but add an attractive natural definition to the eye.
Usually the upper lids are all you need to line. If you want to line the lower lashes go light as a line too heavy on the lower lashes can give an un-natural, owl-like effect on the eyes.
If you want more definition to the lower lashline but want to achieve a natural look, place a few tiny dots of color close to the lash roots along the lowers lashes, a little heavier toward the out side part of the lash to add more tone there.
Applying tgCosmetics liquid eyelinertgCosmetics Lquid eyeliner achieves a more dramatic emphasis to the eyes. It is best used when more a dramatic, glamour look is desired. The key is to carefully apply it to obtain the look you want. Use the same general application approach to applying liquid eyeliner from the eye pencil application tips above.

couch mode print story

How to use Brow Cover


Using Brow Cover can create high style glamour. Applied correctly, the effect will last hours and your fantastic look can make all the difference.

To see our brow pencil shades, eye shadows, mascaras and eyeliners and all of our cosmetics, Click Here. To check out our Brow Wax & Sealer, Click Here. To check out our cream and liquid foundations and cosmetics, Click Here. To see more of our Glamour Makeup Tips, Click Here.
---------------------------------------------------------------------------------------------------------------------------------------------
TgCosmetics.com suggests regular grooming of brows requires tweezing stray hairs for a neat look and attractive shape. In order to re-create your brows into a style reminiscent of the glamorous 30's, you will need to recreate the shape completely. The best way to do this is to shave or tweeze your brows off completely before creating the shape you want. If this is not something that is practical for you to do, the next best thing is to use brow wax to cover your existing brow.
----------------------------------------------------------------------------------------------------------------------------------------------
1Start with a cleansed face and tweezed, groomed brow. First, brush brow so that hairs are in place and in the same direction.
2
Then, carefully, use a thin edge of a metal spatula or table knife/cheese spreader knife to gently scrape off thin layers from the tgCosmtics.com plastic stick until you have enough to form a small ball of plastic, about 1/4 inch n diameter. Let the plastic ball warm between your fingers to your skin temperature for a minute or two until it becomes soft and pliable.
3
With fingers, pinch off a section of the plastic ball and press and spread onto the top of the brow. Add more plastic from the ball as needed to apply and smooth plastic over entire brow. Smooth edges of plastic out with fingers. Use the flat side of the spatula to gently, but firmly, push plastic into the brow to flatten hairs completely under plastic. Add more plastic until you are sure that all brow hairs are covered and flattened. Use a bright light and/or a makeup magnifying mirror to be sure all hairs are flattened and under the plastic surface.

4
When brow is completely covered and smooth, use the TgCosmetics.com clear liquid eyebrow sealer to cover waxed brow. Wait several minutes to allow the sealer to dry completely.
5
Once the sealer has dried, apply a heavy coverage cream foundation over the waxed and sealed brow so that the brow is completely camouflaged. Let foundation set for a minute. If more evening of color is needed use a liquid foundation or corrector cream over and around brow and let dry.
6
Powder brow lightly with loose translucent powder to further camouflage and soften your brow foundation cover.
7
When brow is covered with TgCosmetics.com foundation and powder, you are ready to apply the eyebrow shape you want. Have a plan for the kind of brow you want BEFORE you begin. Choose a TgCosmetics.com brow pencil, a soft liner pencil, or powder eye shadow and pointed applicator tip that complements your hair and skin coloring to draw in the brow you want over the camouflaged brow. Go slowly and take your time. 


Here are several glamour brow looks.
TgCosmetics.com classic, thin glamour brow style. This style is slightly wider above the inside of the eye and tapers out in a full, graceful arch to a hair thin point. Here there is dark eye shadow on the lid with a light shadow dusted just below the outer edge of the lower lash. Darker shadow is applied to outer edge of the lid and crease of the lid. A VERY thin line is drawn as close to the upper and lower lashes as possible. Llight or shiny highlight is added to the brow bone.

TgCosmetics.com wispy thin brows, characteristic of classic glamour star brows of the 20's and 30's. This type of arch creates a sophisticated style adding drama with shadow that extended from the thin brow to the eyelid. Lengthening mascara and a thin line is applied to the upper lashes.
tgCosmetics.com classic proportioned brow.
This brow uses classic proportions to create a thin, yet more current shape and style, wider at the inner point of the eye and thinner where the arch begins to decend. A light dusting of shadow on the eyelid and crease area with a slightly lighter shade on the lid. Mascara heavily on upper lashes and very light, if any, on lower lashes.